Tuesday 17 November 2015

Friday. 09/10//2015. 'Calzone with Ricotta, Pecorino, Mozzarella, Tomato and Pesto.'

This recipe comes from 'Gino's Veg Italia!' by Gino D'Acampo. Page 148.

First I must confess that I always wanted to learn how to make a Calzone. If I am good at making Pizza, a Calzone is not something that I had ever attempted. I will use my traditional excuse here, it was by lack of time and tiredness. As it is not the case anymore but also that my partner happened to be a fan of them, I just had to try my hand on that little gem of a recipe for it. The book picture was very attractive too, temptingly so. 
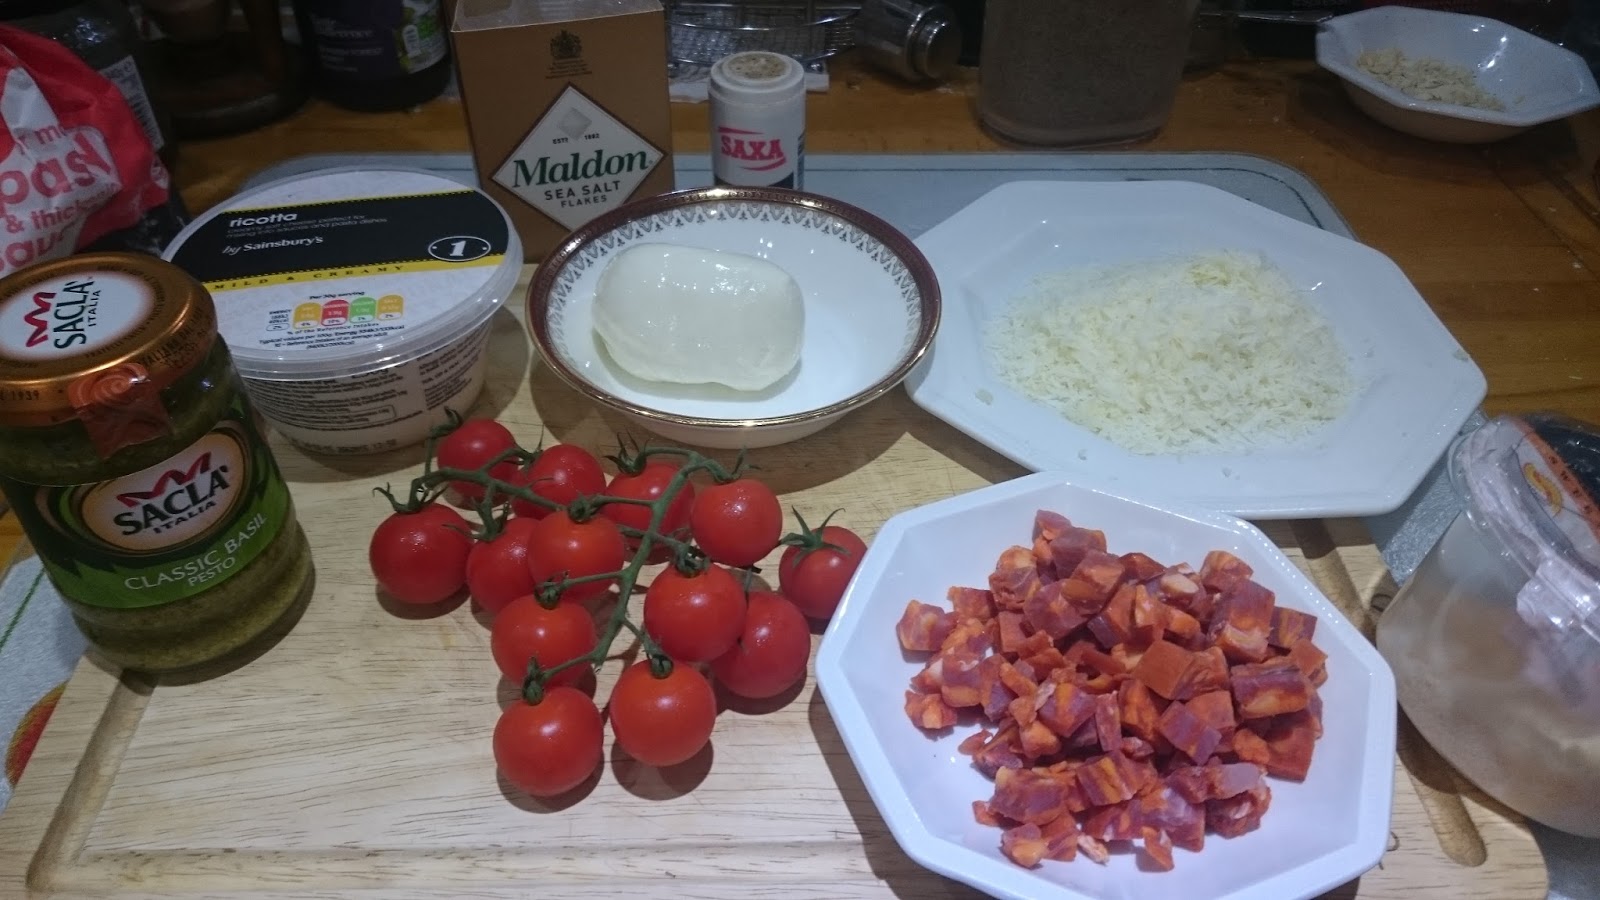


The Prep.


Second I have a home of big cheese lovers which means that the enumeration of so many cheeses in the title did not scare us away to have cheesy nightmares. On the contrary, the recipe of Gino D'Acampo had all the cheese appeal to hook us both.  250g of Ricotta, 50g of grated Pecorino, were duly put on the kitchen counter. As for the Mozzarella, as the recipe makes two Calzones, we did not use just one ball but we went for two... We do love it cheesy is our big excuse there for diverting by one ball of Buffalo Mozzarella.


The Pesto and Parmesan Topping.

In this recipe the first thing you have to do is the filling made of Ricotta and Pecorino Cheese. 
Then comes the turns of the topping which consists of Pesto 2 tbsp, olive oil 2 tbsp and 2 tbsp of  grated Parmesan cheese. All of those ingredients are constant residents in my home for we never have enough of them. 


Calzone dough prep.


Only then come the dough preparation, and if it felt topsy turvy to me, as the result was awesome I can not express one complaint. Sometimes the best thing you can do is just try, discover and learn plenty of new things in the meantime.  Sometimes you can not say you are right or wrong in doing this that way or not to anybody, just experience for yourself what others did from their own experiences. The beauty is that there is usually not one way, there are many and so great to explore and try at home. Until one day you find the perfect one which works for you, maybe with your own tweak and twist on it. 


Yeast and Salt on each side of the  Olive Oil Well 


Cover the Dough.
For the dough you will need 200g of strong white flour, 7g fast action yeast on one side of the flour in a bowl and 3/4 of a teaspoon of salt on the other side. But also 1 tbsp of fresh Rosemary, chopped which gives a fragrant taste to the dough. It makes it extra special, bellissima. Then you make the little well in the centre, put 2 tbsp of olive oil inside it before inserting 140 ml of warm water gradually with the handle of a spoon. It is another Topsy Turvy of Gino, to use the handle to stir rather than the big fat spoon bit, but trust me when I say it worked. 


Once the dough is kneaded for a good five minutes, you put your ball in an oiled bowl and brush it with oil. Then it is a matter of letting it rest for 20 minutes at room temperature.


The Proofed Dough Ball.


Once the dough is ready: It is rock and roll time. Divide the ball into two and roll them out into discs on a floured surface. Now this is not the easiest part in the recipe, I would say it is may be the trickiest to get those round even and make sure they have the right consistency throughout. about 1 cm thick to 2 recommended Gino.


Chorizo and Shallots.
After that comes the assembling. Ready at hand you will have the Ricotta and Pecorino cheese mixture. But I added a few extras and one ingredients was changed for lack of it. For the adds, it was a chopped and softened banana shallots and 80g of Chorizo cubes. I didn't want to get just a four out of five after all that efforts from my partner just because he has to have meat in a dish... So I went for a five and included meat in that one with the Chorizo. I must say it was a very welcome addition. 


Bumble Bee Tomatoes.

Cherry Tomatoes halved. 


For the change we had 10 red cherry tomatoes, halved, instead of the yellow ones that could not be found. A few weeks earlier, I would have used my 'Bumble Bee' tomatoes in that recipe, for a complete winner. And for that I would say that this recipe is seasonal and to plan it with tomato harvest will be best.
Half and Half. 


So on one half of the 25 cm disc, I put the cheese filling then my shallots and Chorizo, the tomatoes, and finish off with the blob of mozzarella torn apart to spread it evenly on top. Then it is a matter of closing the Calzone by pinching the edges together and crimping them. 


Adding the Pesto Topping.


The last stage is that after 7 minutes, halfway through cooking, you then brush the pesto topping on and sprinkle some Parmesan. This topping detail gives a nice finish to the Calzone so much so that it is worth watching the clock to not forget about it. (gas mark 7/220 C.)


The Result.

The all process I would say is not complicated, and the result was fantastic. We both loved it very much indeed and the dish got a high five from the two of us. I will make it again in the Summer, many times every Summer. This recipe is a big winner in my home.


Sunday 8 November 2015

Thursday. 08.10.2015. 'Aubergine Parmigiana.'

This recipe comes from 'Gino's Veg Italia!' by Gino D'Acampo. Page 187.

This dish is a big favourite of mine which I love ordering at the restaurant however I never made it at home. So I was very happy to have this recipe and try it for myself but also to share my love of it to my partner. As the picture in the book didn't look that fantastico, I relied completely on my efforts and that recipe to shine through taste alone. But to be honest a cheesy bake is not about looks but pure comfort. 


Sliced Aubergine.


Now, one of the key element of the dish is a vegetable which is I must admit one of the least liked in this household: the Aubergine. It hardly ever makes it to the shopping trolley or any online orders. However I do love Aubergine  in parmigiana so I went on a small incentive to grow more liking to that veg in our home. I tried to grow some this year to that effect but if I did get a plant, I did not get any veg from it. But we will keep trying until we get a nice aubergine, so next year, we will plant them again.


The Prep.


So the ingredients for this recipe are 3 Sliced Aubergines, olive oil a fair amount, I used more than the 4 tbsp indicated just by oiling every slice of aubergine before grilling them, 70g of Parmesan, 2 ball of mozzarella, (1 more from the recipe for extra cheezyness), 20 g of breadcrumbs. 


Plum Tomatoes.

I changed the tomato sauce a little though for I had six nice plum tomatoes to use up. So with them went 2 garlic cloves, 2 tins of chopped tomatoes, 15 basil leaves and salt and black pepper seasoning. The taste this sauce delivered to the dish compared to how easy it was to make and let it simmer for 20 minutes was amazing. 


Olive Oil Brushing of the slices.
The entire process is very well explained by Gino in his recipe. You start by doing the tomato sauce and while it is simmering you can start brushing with olive oil the aubergine slices.


The Griddling.
Then comes the griddling of the slices of Aubergines on a cast-iron chargrill pan. For me this part was the most technically demanding, but with a hob fully organised it makes the task easier. The trick here is to have the griddle pan very hot. Also the time spent oiling the slices of Aubergine makes all the difference at this stage so it is definitely not worth skipping.


A little Hob Organisation.


Griddled Aubergine Slices.


After that stage when all your slices of Aubergines got those beautiful griddled marks on, it is the time to build up the dish, layer after layer. Gino's recipe gives all the guidance for it very clearly which is fantastico.  I used 2 rather than 1 mozzarella ball (like in the recipe) just because we are fond of them. 


Breadcrumbs with a difference.

For the breadcrumbs, the one I used are shop bought, from Sainsbury's and flavoured: lemon and black pepper. I always have a pot of those in the cupboard for we enjoy their taste. However proper breadcrumbs are easy to do and it is my plan to make batches of those ready to be used when needed, and yes, I will flavour them with lemon zest and cracked black pepper. 


Building up the layers pic 1.


Building up the layers, pic 2.

Once the lovely layers of tomato sauce, Parmesan, Aubergine, and seasoning are repeated about three times, you finish off the dish with the rest of the tomato sauce  and the Mozzarella broken heavenly/evenly all over and 'Et voilà'. 


After 40 minutes in the oven at gas mark 4/180 C and 20 mins resting inside it, we had the Aubergine Parmigiana. 


Aubergine Parmigiana à la Gino D'Acampo: the Result.

For the first time I made it, I absolutely adored it. I admit that the entire process can appear demanding but face with the result in the end it is all worth it and I will keep that recipe of Gino D'Acampo as a standard one for Aubergine Parmigiana in my home. The only complaint my alter ego had was that the dish was completely vegetarian so he would have loved maybe just  a layer of prosciutto to give it a five. So it was a four for him on this aspect alone. However like me who is not a great fan of Aubergine, he found that this recipe did make him appreciate that veg much more. 

For me, it was, of course, a high five. We will do this recipe again and maybe with the prosciutto like suggested.


Thursday 29 October 2015

Wednesday. 07/10/2015. 'Perfect Autumn Soup with Butternut Squash, Orange and fresh Ginger.'

This recipe comes from 'Gino's Veg Italia!' by Gino D'Acampo. Page 205.

This time I can not say the book pic looked great or appetising for there was none. It was just the ingredients which sounded excitingly appealing. 


Soups are great medium to bring seasonality into your plate. In this number, with us being in Autumn, it is all about Squashes and particularly the Butternut Squash. 


Squashes.


We love Butternut Squash so much so that we tried to grow them this year however with mixed results. Any plants started at home, grew quickly to then die after their second and third leaves. In desperation we tried to plant some straight outside, two of the common Butternut Squash and two called Coquina.  However it was mid May when we took that decision.  They thrived but then October arrived too soon and we had to harvest green Squashes who did not have time to perk up in sizes. Although they can get their colour by the window sill, I can only advise a sowing of those babies straight outdoors from March to give them plenty of daylight from the start. Well this is our plan for next year, having learnt the do and don't this year. 


Butternut Squash : 2015  trial.


the Prep.
So the ingredients which accompanied one entire Butternut Squash, were 3tbsp  of olive oil to fry 2 chopped red onions and 3tsp of fresh ginger, 1 Maris Piper potato, 1.2 litres of hot vegetable stock, 1 orange: the zest and 150ml of juice from it.  


Very Lazy Ginger.
Got to tell you a secret, I have been cheating with fresh Ginger for a while in my kitchen.  Each time I am buying fresh Ginger, I use a bit of it for a recipe and the rest get lost and wasted in no time at all after grating. So I did resort to use the little pot of wonder that is called 'Very Lazy Ginger'.  It comes into strips easily cut to your liking for any recipes and it last long. Like that, I always have Ginger at home ready to use and no more waste. Beside that Ginger is a fantastic ingredient to give a certain warmth to a dish.  It worked beautifully well in this soup. 


The great Autumn soup in the making.
The zest and juice of the Orange add that extra zing and flavour, which made the entire soup simply utterly delicious for it. Spoonfuls of Mascarpone Cheese finished of the soup, with a good pinch of cracked white pepper and 'Et voilà.' 


I actually made that meal less veggie for my partner by cooking some little cubes of Chorizo to add as yummy decoration on top of the soup. So it was not totally Veggie, but it still had the massive thumbs up anyhow for the spiced paprika sausage worked well with the other flavours, it was a home winner. 


The Result.
This little Autumn Soup got a five star from both of us and will make a come back at home for it was just delicious, just the right combination of ingredients. We loved the seasonality of it and do recommend strongly that tasty number.


Fougasse. 
We had the soup with a side of a gruyére 'fougasse' to share. A fougasse is a lovely type of French bread which is a firm favourite at home. The soup was an economical dish too as we had plenty left for lunch the following day. That is what we call a good all rounder. 


Tuesday 20 October 2015

Tuesday. 06/10/2015. 'Pappardelle with simple Mixed Cherry Tomato Sauce.'

This recipe comes from 'Gino's Veg Italia!' by Gino D'Acampo. Page 96 and 97.


Book Pic.

Finding Gino's recipe for homemade fresh pasta I was very keen to try it despite it not requiring my still unused pasta machine. Doing it all by hand and from scratch gives you the comprehension of the entire process of making pasta. It is not that complicated to do yet it is fairly demanding. Learning to make my own bowl of pasta, especially if it looks as good as the book pic, has been one of my plan/dream for ages. 


Pasta Dough Prep.

First it was a matter of making the pasta dough which was not difficult. The important bit is to do it with pasta flour of the '00' grade. This flour is not difficult to find, a trip to the supermarket is all it requires as making pasta is an embedded trend which made this product readily available on the shelves. 

It only takes flour 400g, 4 eggs, 2 tbsp extra virgin olive oil and 1/2 tsp of salt to make the pasta dough, and a bit of elbow grease for the kneading once the ingredients are combined. 


Rolling the Dough flat.

After the dough resting (30 minutes in the fridge in a bowl covered by cling film) there is the shaping of the pasta by rolling the dough flat. I must say I was fairly crap at this part and I had slightly thick ribbons of pasta as a result. However I had helping hands which came uninvited along with amused eyes watching my first efforts at pasta making. 


Fatpardelle.

Once I had my 'Fatpardelle' sorted, I just needed to cook them along with that beautiful yet simple Cherry Tomato sauce. The preparation on the kitchen counter (2 garlic cloves, 10 cherry tomatoes halved, 10 red plum tomatoes quartered, 1tbsp of honey, 1 tin of cherry tomatoes, a few basil leaves) benefited of a couple of extra ingredients. 


Sauce Prep.

First, I must confess that a simple Tomato sauce would not have been able to hide any of my cocking up of the pasta big time: I had to have a fall back, kind of plan, like a making the sauce more 'Ragu' like to give it a meaty consistency in case we ended up eating just the sauce for dinner...  I had leftover minced beef  from the Jamie's Samosas' recipe to use up to which I added a chopped white onion. The 200g of mince meat worked as my big excuse and plan B. 


The Beefed up Sauce.

Second, I had a glut of green peppers in the garden which we harvested because the weather turned and the nights are too cold, so two of those babies made it into the sauce. Romanesco peppers that did not turn red on time, I do not think they disturbed the overall recipe as much as the minced beef did but whatever they did together gave a bit of substance to the sauce. 


Pasta in the Sauce.


Due to their thickness my home made pasta did took a little more to cook in the boiling water. Once done they are put in the sauce before being dished out.


the Result.

The dinner was very nice and very filling. It tasted Fantastico. The only downside was my fault which was the thickness of the pasta. But with practice I will get better at it, hopefully. The recipe got a five so it is a come again Home Made Pasta.


Friday 16 October 2015

Monday. 05/10/2015. 'Fennel and Leek Tart with Pecorino Cheese.'

This recipe comes from 'Gino's Veg Italia!' by Gino D'Acampo. Page 82.


This week's trial, the emphasis is on vegetables... Love them or hate them, a balanced diet includes them. After last week healthy menu that went so well, we were on an incentive to keep it going. But also for us as keen gardeners, knowing what to do with our grown veg to show them at their best is a biggie. 


Book Pic.

This first dish was appealing to me because I like fennel a lot but I must confess that it is a veg that does rarely appear on my shopping list. It's a little bit about introducing more diversity at home, for the world of veg does not consist of potatoes, onions, carrots, tomatoes and celery. All of which are the staple veg in this household. The book picture was also very attractive. 


The Prep.


Cubetti di Pancetta and Leeks mix.
I was faithful to the recipe apart from one added ingredient, cubetti di Pancetta, 80g which I cooked alongside the leeks. Although I would not mind eating totally veggie for a week for I did have a six months spell of vegetarianism back in my days, it is another story with my carnivorous other half. So I treated that Tart a little bit like a 'Quiche' and it did the trick to please.

Frying the slices of Fennel first like Gino says gives them that lovely toasted look, that visually appetising edge. Then the tart's filling of eggs, milk, cream, pecorino cheese and toasted fennel seeds was easy to whisk together into an unctuous mixture.


Filo Casing.
The most difficult part here is the lining of the tin with the filo pastry to make the adequate base for the filling. It involved brushing with melted butter each sheet of filo to built up a sound case that will hold the filling. The more you add a sheet, the more the shape surrounding the tin looks like a star, but this allows you to create decent edges, high enough. 

The build up is leeks and cubetti di Pancetta, then the egg/milk/cream/Pecorino mixture goes in followed by the fennel decoration on top, and the tart is ready to go in the oven. 


The Built up Tart.


Side Salad.


While I waited for it to be ready I prepared a little side salad with some ingredients leftover from last week. It was easy to jazz up together, chopping a Cucumber into cubes, chopping the Parsley roughly, a couple of Spring Onions then halving the Radishes, and pickling the last two elements the way Jamie Oliver's week taught me. Build the side salad on the plate at the last minute, just before removing the Tart from the oven just to give that miracle simple pickling a chance to do its magic and: 'Et voilà': My leftover salad! Mind you I have to admit that the 'Super Food' week trial left me with very nice ingredients to chose from. 


Out of the Oven.

The Fennel and Leek Tart that came out looked fabulous and both of us were impressed. But the ultimate proof is in the taste on the plate. 


The Result.

This first dish of the week delivered on flavour and simplicity. It was a truly scrumptious dinner which we both enjoyed. It got the high five. Economically, the Tart divided in four, left two slices for our lunch boxes which is a plus added to its great taste. We will definitely have it again.